A User's Guide to Article Building

A User's Guide to Article Building is an old article from ED that I wrote and I am saving a back up copy here for myself.
When I was in college there was a class called "How to Study." The fact that this class, which I never took, existed always bothered me. Why would you make a class at the college level for this sort of thing? By the time a person was in college, wouldn't it be water under the bridge? Wouldn't students be better served if they were given this class in first grade? I think so. The purpose of this page is to give new or old users some insight into how I go about "How to Study" and further, how I go about "How I Write."
Sometimes I am asked "How do you do it?" Or, "How come you can write so many articles?" This page will give a reader a general primer of what I do when I start, work on, polish, and complete an article. I must say that I cannot help you with your work ethic itself, however, I find that if put together a system that logistically puts a set of rules into a working order, I am better off in my production and output. This is just my set of personal rules and should not be considered ED policy. For a set of real tutorials concerning the total process readers should check out mediawiki's extensive help section. It is the most excellent resource, written by many experienced wiki editors concerning everything from explaining what a wiki is all the way to completing a full article.
This is just a common template that I use to write an article on ED. It is by no means the way everybody should write an article, but it is a nice set of guidelines to follow while you are adding content to the wiki. As you may have noticed, this section of text is above the table of contents located below. This section of the article is (in my nomenclature) called the “introduction section.” Here you will give an opening statement that will contain a brief synopsis of what your article will contain. It also helps if you put what is called a “hook” in this section. A hook is a small blurb of text that will catch and keep the reader’s interest.
History or Background
The next section of an article should probably be the history or background of the subject you wish to inform the reader about. Here, things that have gone on in the past should be discussed, profound highlights of the subject’s history that will give weight and poignancy to your article. Also, any important dates, locations, or facts that will set up your article should be placed here.
Description or Situation
|
|---|
Here you can discuss the huge amount of information that you have collected on your subject. It may be nice to lead into your subject’s description with a quote either about that subject or from that subject similar to the quote that I placed above. If you have a particular drama you wish to exploit, it may be a good decision to add a lead in to it here. To do this, give a brief phrase about the meat of the article that will follow.
Main Body of the Article
This section of your article should explain the Who, What, Where, When, How -- a common practice used to detail all of the things that your article means to deliver to the reader. You may find that you will use several subsections (single subsections are considered poor form) to do this as your article may have many central characters or points that you wish to drive home.
Main Body: Subsections
If you are going to use subsections, remember the rule that if there is one, there has to be two. What this means is if your main body has one subsection there has to be a second (or third, or fourth) subsection. Any information that might be contained in a single subsection should be merged with the main body of the article.
One thing to remember when using subsections is that they add entries to your table of contents above. This is a good thing as it will allow you to link to specific portions of your (or anybody else’s) article should you find the need to do so.
Main Body: Sub-Subsections I
I don’t think I have ever used or seen anybody else use a sub-subsection within an article other than to point out the fact that they are there. Like proper subsections, if you have one sub-subsection, get rid of it and merge it into its main heading.
Main Body: Sub-Subsections II
Unless you are getting really, really specific about a subject, I don’t think it would be a good idea to use a sub-subsection…however, there are a lot of OCD writers out there, so don’t take my word for it.
Main Body 1: Lights, Sirens, Bells
Within the framework of wiki markup language, there are literally thousands of lights, sirens, bells, doohickies, doo-dads, thing-a-ma-jigs, and thing-a-ma-bobs with which you can "pretty up" or "uglify" your page. As I do not use very many of these things, they will only be spoken of briefly here.
Main Body 2: Images
While you are discussing the information you have, you may wish to add images, gif animations, or screen captures. Few things are as true as the phrase: "A picture is worth a thousand words” when it comes to adding detail to your article. Images, when pertinent to your article, add more weight to your text while at the same time breaking up the “wall of text” effect that may bore your readers. A common guideline I like to follow is to add very few images starting at the top; perhaps one or two pictures per section. The main grouping of images will be placed in a gallery below.
Main Body 3: Quotes
|
|---|
Sometimes you will find a lot of people have opinions about your subject. This is a good thing! since you want to pack as much information as possible into your article, people’s quotes can be harvested and put into your article. I like to find quotes that are particularly damaging, funny, and short and then put them into the main sections of my articles because they bust up that wall of text we were talking about and they also lend a bit of gravity or light heartedness to the article. The main section of quotes should be made below and should contain quotes that are longer and may stray from the original topic at hand even if they still deal with your subject.
Main Body 4: Image Gallery
In this section, I always find that Photoshops work best. If your subject has been discussed at length on the internet, you will invariably find that somebody has used an image editor to make a funny or damaging picture. A good place to start is Google Image Search, but your search should not just stay there, using the plain old Google search engine can yield several pictures as well. Other images that are probably best going in a gallery section are gif animations or images that are rather large and might take a while to load. For further information about galleries, see below.
Main Body 5: Bullets and Offsetting Text Using <pre>
While writing an article, I find that sometimes I will have to set an ordered list to make a point. To do this, you should use the bullet point function that ED’s wiki markup uses.
- To do this
- You should
- Use the Asterisk ( * ) found by using the Shift+8 keys.
- Two Asterisks will further itemize your bullet points.
There are other types of point lists you can use such as a numbered list. I think I have used a numbered list on one occasion.
Another Wiki markup function that you might find yourself using are the <pre> and </pre> tags. I use these to separate a quoted irc log from the main body of the article. This function will offset the text you wish to highlight and show that you are taking irc quotes directly from their source.
Kaz: I am writing an article about articles.

John: Good luck with that, pal.

Kaz:  :(
Other uses for the <pre> and </pre> tags could be anything where you have a large body of text that you wish to offset from the main portion of your article.
Main Body 6: Piping
Piping inside of your article is a fancy way of saying that you are adding links within the text of your article. This is an integral part of wiki writing as it helps add context to your situation. A good example of using piping would be while describing how tall a person is, to add a piped link that leads to another article that details height in human beings. While neither of these pages are available on this wiki, the main idea is what I am trying to get across. Below, I have added a real piped phrase to show you just how it works:
- Bob was a member of Anonymous even if he did not realize it.
What this does is link the article “Anonymous” to the sentence so that a reader will gain a perspective on just exactly what “Anonymous” is. The correct coding is below:
- Bob was a member of [[Anonymous]] even if he did not realize it.
Another way to add piping to your article in a similar fashion is this:
- Bob was a member of Anon, even though he did not realize it.
What I am doing above is adding a word to describe Bob and linking it to the article concerning “Anonymous,” even though I am not using that word. This is a way to insert humor or draw the reader’s attention without using the bold, italic, or underline functions detailed below.
Some editors like to go crazy with piped links. I find that this detracts from the reading experience and will generally slow down or stop a reader. Large paragraphs that are all blue link text may be considered incredible wiki editing, but ED isn’t a wiki about wiki editing, it is a website that requires its readers to actually read the contents of its articles to better understand the subject. For this reason, I feel that one or two pipes should be inserted per paragraph. Again, this is by no means a rule that is set in stone, but rather a guideline that has worked for me in the past.
Main Body 7: Further Discussion of Piping
Many editors will pipe their articles as they write them because they have a specific point they wish to link to. I try to avoid this type of piping as I have enough on my mind with the keyboard and the thoughts I have on the subject. If you are skilled enough to just pipe away while you are writing your text, go right ahead. Do not let my shortcomings be a hindrance upon your own writing. Once I have finished typing out my article, I like to go back and search out the articles that I will then pipe into my text. I do this by adding notes to the main story. Some may consider this OCD when it comes to writing, but I find that it helps me out. So, if you wish to follow my advice: write everything first, pipe it later when you have found links that are specific to your point.
One last thing that I like to do while piping…when I find that my text is dealing with something serious or something pertains to my subject in a technical manner is to pipe words to sarcastic or rude links. This is just something I do to add additional scorn or humor upon my subject. I do not do this often.
Main Body 8: Using Bold, Italic, Underlined, or Strikethrough Text
While writing my articles, I find that I will often have to add emphasis to a large or small block of text. To do this, I use the Italic function that is native to wiki markup language. By using the single quotation key (') key two times, you can add italics to your text.
- Example: this is italicized text
Sometimes italicized emphasis is not enough, when this situation occurs, I will use the bold function that is native to wiki markup language. To do this, I use the single quotation (') key three times to add boldness (thicker) to the letters of the words I am trying to emphasize.
- Example: this is bold text
Both the bold ''' and the italic ’’ functions can be used together. To do this, I use the single quotation (') key five times to add bold italics to words I wish to emphasize an incredible amount.
- Example: this is bold text that is also italicized.
Underlined text is also an option to use if you wish to emphasis or add weight to what you are trying to say. To underline text, wiki markup has a special code that you insert into the text of your article while you are using the editor. To make underlined text in your article, add <u> and </u> around the words you wish to underline.
- Example: this is underlined text.
Another text tool that is similar to the underline function is the strike through function. This code should be used very sparingly as it is not considered proper. However, there are times when a person wishes to add humor to their article and will decide that the strike through function is the way to do it. To add strike through to your words use the wiki markup code <s> and </s> to your article and it will strike through the text you have placed those codes around.
- Example:
this is strike through text
Main Body 9: A Brief Note on Wiki Markup Language
The above examples of Wiki Markup Language that I have provided are only a tiny fraction of the coding that is available to you for your use on the ED wiki. Just about anything you can imagine can be coded and will visualize on your article when you have done things right. The only limits you will find are your imagination and your skill when it comes to coding. As I have a very limited grasp on wiki code, I find that I often will keep things simple and forgo huge blocks of code, but in certain cases I find that I will have to use something that goes above and beyond what I would normally use. When I encounter something that might require something special, I often will just go to another article and copy the code there, then paste it and modify it for my article. This is okay!
One last note about wiki markup…in my case, I find that K.I.S.S. is always the best course of action. If you do not know what K.I.S.S. means, it stands for: “Keep It Simple, Stupid”
Main Body 10: A Briefer Note on Grammar, Punctuation, and Spelling
|
|---|
First, I need to point out that Encyclopedia Dramatica is a professional website, despite whatever it is that you may think. The articles contained within it should be written with all the care and professionalism that a person would use when writing a business letter. This rule is my own rule and is very bendable. Whenever there is a humorous point that requires something outside of this rule, by all means, hack the English language to pieces. Humor aside, remember that you are writing for a wiki and what you type reflects upon both the wiki and the community behind the wiki.
While I am hunting and pecking my 20 words per minute out on my keyboard, I tend to write in a manner that leaves much to be desired when grammar, punctuation, and spelling are concerned. I know I am absolutely terrible at using proper English when I am writing. I like to think that this is because I am writing so fast, putting those words down as quickly as they come into my mind, that I don’t have time to go back and fix all those little mistakes. Sadly, this is not really the case. I know that I am appalling when it comes to properly formatting sentences and spelling, so I rely (heavily) on my word processor software’s spell check function. If you are at all like me, I suggest that you should do the same. Also, it has a handy Thesaurus for when I need a better word than I was thinking of using.
Quotes
I always put the quotes after the main body of text. Why? Because I find that the average internet user is geared towards pretty lights, sirens, and bells like images and video links. By sticking the quotes section within the main body of text, it shouldn’t be as overlooked as it might be if it were stuck at the very end.
Some rules I like to follow concerning my Quotes sections are:
- Four or five quotes can go into the body of the article without any special wiki markup. They will not break up the article with huge spaces of blank white to the point where the article looks shoddy and unkempt.
- If I have a large amount of quotes I wish to display, say six or more, I will add a morphquote to my page. A morphquote is special wiki markup that will put your large number of quotes into a table that a reader can then move through by clicking on a link at their leisure. Colors and border colors can be added to a morphquote. This is not available on this wiki and is only specific to ED.
- Only add images to your quote section if they directly pertain to your subject’s quote. Otherwise it should just be added to the Gallery section.
Example of a Quote Section
|
|---|
| " The squote will allow you to make smaller quotes " Kazantzakis quoting Kazantzakis...only smaller. |
![]() The Q template will give you a quote without a signature
The Q template will give you a quote without a signature ![]()
Gallery
The same idea that huge amounts of quotes will break up your article too much also goes for a huge gallery. I find that if I have twenty images or less, I can use the plain gallery (<gallery> and </gallery>) code items to make a table that will look pleasing and not take up that much space.
If I have more than twenty images, I like to use the collapsing gallery code to make the gallery into a smaller block within the article. The collapsing gallery is very much like the morphquote used above in the quotes section. It allows the reader of the article to open up a gallery and view it at their leisure without causing their browser to load a huge amount of images at the get go, nor does it break up the article with huge spaces of white.
Don’t attach images to this section. Images inside of a gallery section is redundant.
Example of a Gallery

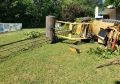
going deep
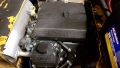
Kohler Command
installed engine

engine bay

faded old glory

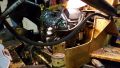
unboxing day

body shot
reverse angle flip


Video
I like to add my video content at the very last part of the main body of my articles unless there is a very specific video that is needed in a section to make a very specific point. This is another example of a rule that I follow, but can be tossed out the window as required. Another rule I follow is that if I have four or less videos that I want to add to a page I just stick them in using the normal video embedding codes. If I have more than four videos to put within my article, I will use the morphing embed code. I think it just makes things look better when handling more than four videos. Since 99.9% of all videos embedded on this site are from YouTube, I will give my examples by using the YouTube embed code.
Video Embed Example
This is an old favorite and will show you how to embed a video within your article. Notice that I use the <center> and the </center> code functions. This is not another rule set in stone, but I find that a centered video just looks better on the page.
The See Also Section
Within this section, I like to add as many ED pages that have something in common with the subject I am writing about. If a my page deals with a drama queen, I will link other drama queens as examples of what type of article and person we are dealing with. Usually, when I add a “See Also” section within my article, I keep all of the links within ED…this is a general rule I follow as I feel that the site should deal within the site when it comes to examples. It also has the added bonus effect of keeping a reader on ED and not drifting away to some other site.
The External Links Section
Here is where I add all of those links to offsite content. Most of the time, within my articles, I will add as many references as I can dealing with the subject I am writing about. If a particular article deals with a drama that occurred on a image board, I will link to that image board. If the article deals with something that was posted on a forum or group, I will link to that forum or group. If an article deals with a meme or photo…etc. It goes on and on that way. Finally, when I am dealing with a specific person, I like to add any or all of that person’s social networking sites that I can find. Also, I like to add any sites that deal with that person in a humorous way. So if my article deals with somebody who rants all day on an irc channel, besides linking the irc channel I will link the website that all the other people made about the ranter…because it’s funny.
Categories and Series: Things that go on the Bottom of the Page
Always add a category to your page. Your subject needs to be added to the whole of the ED wiki and by adding a category to your article, you will be giving anybody perusing the wiki a chance to see just what they are dealing with when they decide to pick up and read your work. For example, if you have just written an article that concerns another website, your article should contain the wiki markup: [[Category:Sites]] within its text. This will add a block to the bottom of your page that will contain the wording “Category: Sites” and also help the environment of the wiki by keeping a set framework in order.
Similarly, there are series (or even portals) on ED that are major portions of the website itself. These series allow a reader to find similar articles that may deal with the same subject matter. To add a series to your article, you must find the series template that best fits the focus, issue, or theme of your article.
By adding a series template to the article, you will not only add to the content of your page, you will give your reader an easy way to find articles that are comparable to your own article, find more information on your subject, or find other people that may be doing the same things as the subject you have chosen to write about.
It is just good practice to add a category and a series template to the bottom of your page.

Dan's Devil's Dictionary | Charles Bukowski | Bookz | New York Yankees | G/tv | Kyleville | Ellen's Hickey | Generic Article | A User's Guide to Article Building | Introduction to English | Salman Rushdie | Rainmeter | Sex Panther | A Pocketknife | Thomas Paine | Wook | Three Or Four Weeks | Internet Relevance | Jim Rome | DMV | Public Library | The Copperhead | Monopoly | Around the House | Marcus P. Kellum’s Personal Journal | Solitaire | Internet Explorer | Billy Ripken | Ka-chunk | Clacka-Clacka | Mickey Mantle | Terry Tate Office Linebacker | Berry | 1guy1jar | Babcock Dairy Farm | Goatse.cx | Old Hoss Radbourn | Rufus Owned A Steam Engine | Blanche Dumas | Thundarr The Barbarian | Superfriends | That Time Is Now | Hong Kong Phooey | Fractured Fairy Tales | Little Twelvetoes | Mullet Girl | Hanker For A Hunk O' Cheese | The Chopper | Yuck Mouth | The Angle Of The Dangle | Michelob | Bulova Computron | Vinko Bogataj | Lower Case, Upper Case, and Shift | Speaking in Texican: A Primer | Samsung Galaxy Tab A | The Old Farmer's Almanac | Bama Quarterbacks | American Mousetoss League | The Long Lost Friend | Cockshutt | The Catcher In The Rye | Zombo.com